
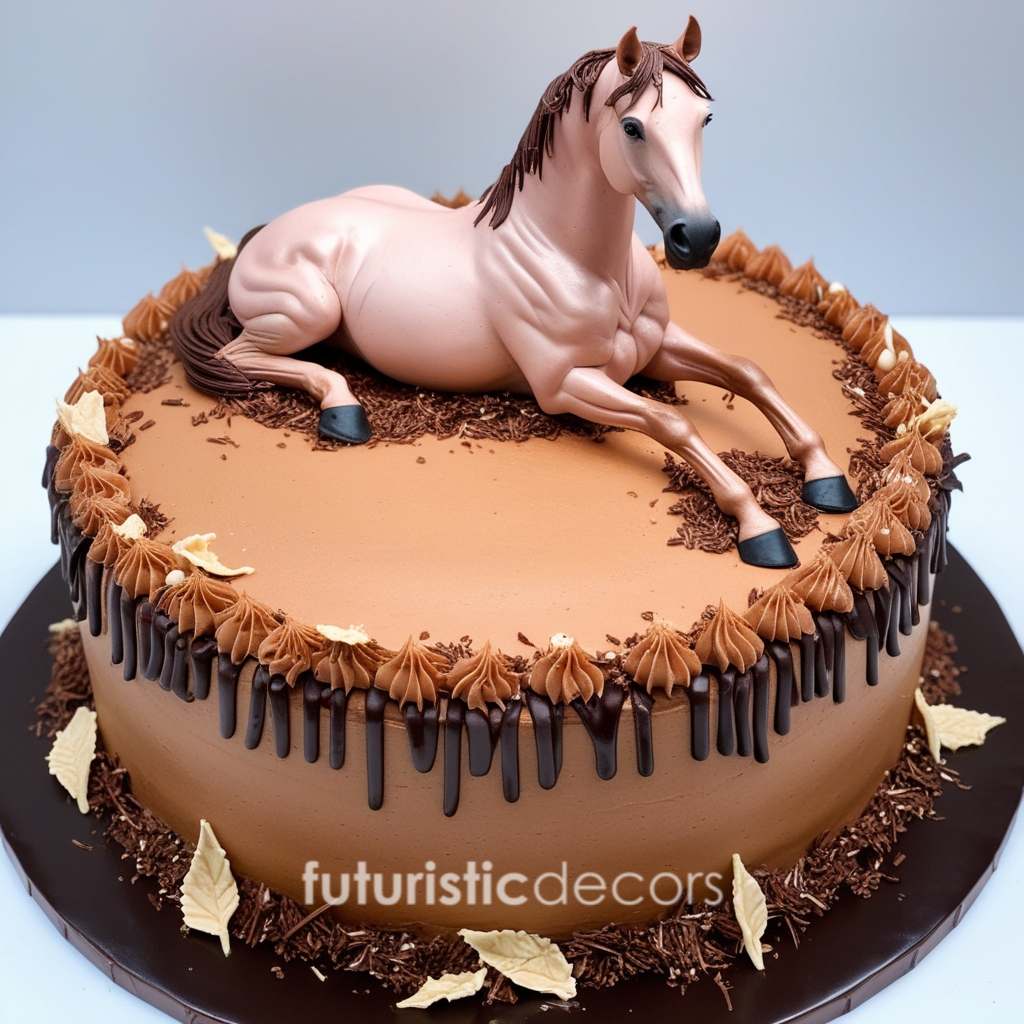
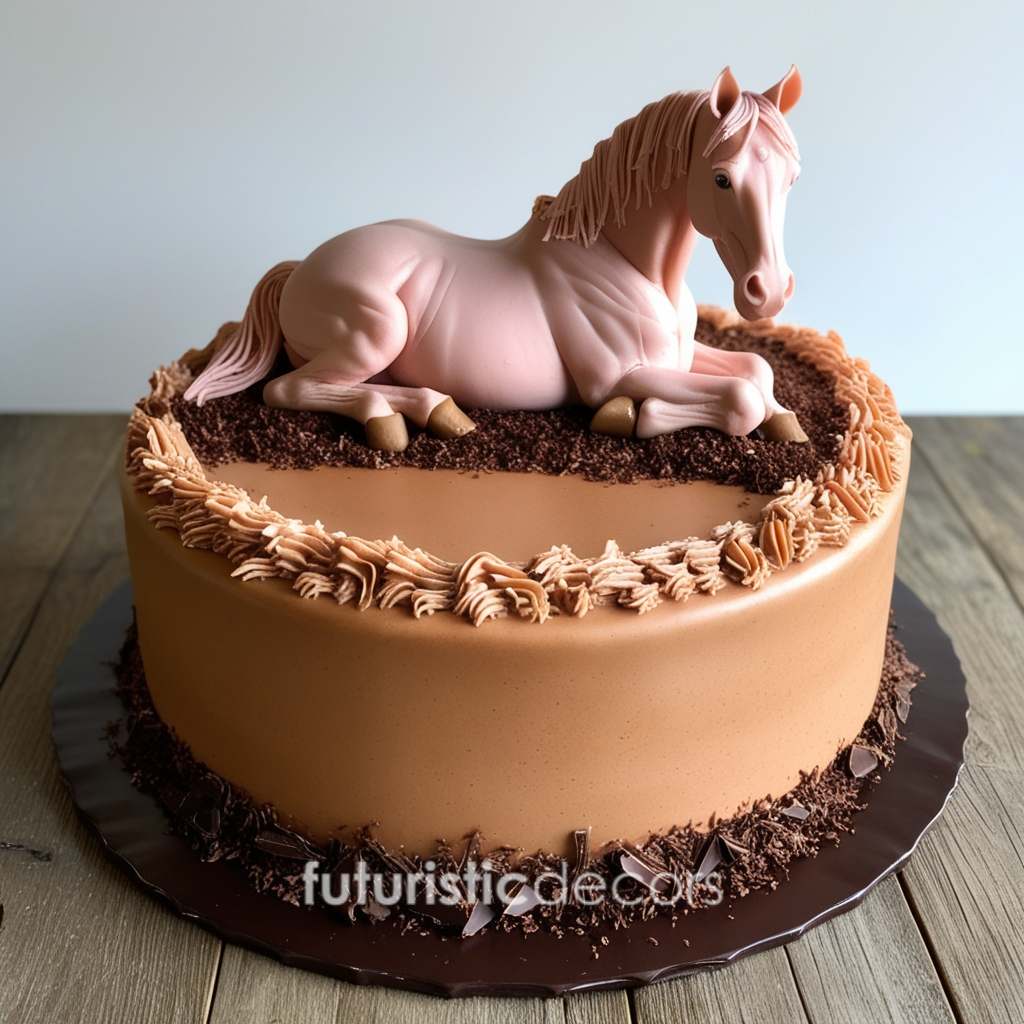
Baking isn’t just about mixing ingredients—it’s an art form that allows you to transform simple components into a delicious masterpiece. In this comprehensive guide, we’ll walk you through every step of creating a Stunning Horse Birthday Cake that is as delightful to the eyes as it is to the taste buds. Whether you’re celebrating a young equestrian enthusiast’s birthday or honoring a devoted horse lover, this article is your complete resource for crafting a show-stopping cake in your very own kitchen.
Below, you’ll find a detailed breakdown of ingredients, planning strategies, baking techniques, advanced decoration methods, troubleshooting tips, and presentation ideas to ensure your cake not only meets but exceeds your expectations.
Introduction: Stunning Horse Birthday Cake
Baking a cake that tells a story is one of the most fulfilling creative endeavors you can undertake. The idea behind a Stunning Horse Birthday Cake is to capture the elegance, power, and beauty of horses, turning your dessert into a work of art. This guide is designed for bakers of all levels, offering clear, detailed instructions that cover everything from the first mix to the final decorative flourish.
Imagine the joy on your loved one’s face when they see a cake that not only tastes divine but also showcases their passion for horses. By following our guide, you’ll learn how to combine baking fundamentals with artistic decoration techniques, ensuring your creation stands out at any celebration.
Gathering Your Ingredients and Tools
Essential Ingredients
A well-crafted cake starts with high-quality ingredients. Here’s a complete list to prepare your cake batter, buttercream, and decorative elements:
Cake Batter:
- Dry Ingredients:
- 2 ½ cups all-purpose flour
- 2 ½ teaspoons baking powder
- ½ teaspoon salt
- Wet Ingredients:
- 1 cup unsalted butter (at room temperature)
- 2 cups granulated sugar
- 4 large eggs (preferably at room temperature)
- 1 teaspoon vanilla extract
- 1 cup whole milk
- Optional: ½ cup sour cream (for extra moisture and richness)
Buttercream Frosting:
- 1 cup unsalted butter (softened)
- 4 cups powdered sugar
- 1–2 tablespoons heavy cream
- 1 teaspoon vanilla extract
- A selection of food colorings (choose hues that complement your horse theme, such as earth tones and soft metallics)
Decorative Elements:
- Fondant in various colors (brown, white, black, and accent colors like gold or cream)
- Edible glitter or shimmer dust (for an extra magical finish)
- Horse-themed cake toppers or edible images
- Piping bags with assorted nozzles for fine detailing
- Modeling chocolate (optional, for creating 3D accents)
Must-Have Tools and Equipment
Before you start, ensure you have these essential tools:
- Cake Pans: Two or three round pans for layering
- Mixing Bowls: A range of sizes for different ingredients
- Electric Mixer/Stand Mixer: For creaming butter and sugar efficiently
- Spatulas and Whisks: For folding ingredients smoothly
- Measuring Cups and Spoons: To ensure accurate measurements
- Cooling Racks: Allow your cake layers to cool evenly
- Rolling Pin and Fondant Smoother: Essential for working with fondant
- Cake Leveler or Serrated Knife: For leveling your cakes before stacking
- Offset Spatula: To achieve a smooth buttercream finish
Having everything organized and within reach will streamline the baking process and help you maintain focus on creating your Stunning Horse Birthday Cake.
Planning Your Cake Design: Stunning Horse Birthday Cake
Conceptualizing the Theme
The theme is the heart of your cake. A Stunning Horse Birthday Cake should embody both the strength and grace of horses while maintaining a playful, celebratory spirit. Consider the following:
- Color Palette: Earthy tones like browns, tans, and creams evoke the natural beauty of horses, while pops of gold or pastel hues add an element of festivity.
- Design Elements: Incorporate horse silhouettes, horseshoes, or even a hand-crafted fondant horse. Think about whether you want a realistic depiction or a more whimsical interpretation.
- Layer Structure: Decide if your cake will be a single-layer delight or a multi-tiered masterpiece. Multi-layered cakes provide additional space for creative decoration and offer a dramatic presentation.
Sketching Your Vision
Before you mix your ingredients, sketch your cake design. Outline:
- The placement of the main horse figure or silhouette
- Decorative accents like piped borders or fondant flowers
- Any text or personalized messages (such as the birthday person’s name)
This blueprint serves as a roadmap during the decoration process and ensures every element is proportionate and harmonious.
Setting Up Your Workspace
A clean, well-organized workspace is critical for a smooth baking experience. Ensure that:
- Your countertop is clutter-free
- Ingredients are pre-measured and ready to use
- The environment is cool and free from drafts (especially important when working with fondant and buttercream)
By preparing thoroughly, you minimize stress and set the stage for success with your Stunning Horse Birthday Cake.
Baking the Cake: Step-by-Step Instructions
Step 1: Preparing Your Cake Batter
Preheat and Prep:
- Preheat your oven to 350°F (175°C). Grease your cake pans with butter or non-stick spray, then line the bottoms with parchment paper for easy removal.
Mix Dry Ingredients:
- In a medium bowl, sift together 2 ½ cups of all-purpose flour, 2 ½ teaspoons of baking powder, and ½ teaspoon of salt. Sifting ensures that the ingredients are well combined and free of clumps.
Creaming Butter and Sugar:
- In a large mixing bowl, beat 1 cup of room-temperature unsalted butter with 2 cups of granulated sugar. Continue beating until the mixture becomes light, fluffy, and pale in color—usually 3 to 5 minutes on medium-high speed.
Incorporating Eggs and Vanilla:
- Add in 4 eggs one at a time, beating well after each addition. Stir in 1 teaspoon of vanilla extract to infuse the batter with flavor.
Combining Ingredients:
- Gradually add the sifted dry ingredients to the butter mixture, alternating with 1 cup of whole milk (and sour cream, if using). Mix gently until just combined; overmixing can lead to a dense cake.
Step 2: Baking and Cooling
Dividing the Batter:
- Evenly distribute the batter among your prepared pans. Give the pans a gentle tap on the counter to release any trapped air bubbles.
Baking:
- Place the pans in the oven and bake for 25–30 minutes, or until a toothpick inserted into the center comes out clean. Avoid opening the oven door frequently to maintain a stable temperature.
Cooling:
- Allow the cakes to cool in their pans for about 10 minutes before transferring them to a cooling rack. Cooling on a rack prevents the cakes from becoming soggy and allows air to circulate around them.
Step 3: Leveling and Layering
Leveling:
- Once the cakes have cooled completely, use a cake leveler or serrated knife to trim any domed tops. Flat layers ensure that your stacked cake is stable and even.
Stacking:
- Place the first cake layer on your serving board. Spread an even layer of buttercream on top before placing the next layer. Repeat this process if you’re using more than two layers. A steady hand and a careful approach will make all the difference in achieving a professional finish.
By carefully following these steps, you’ll create a moist, flavorful base that is perfect for your Stunning Horse Birthday Cake.
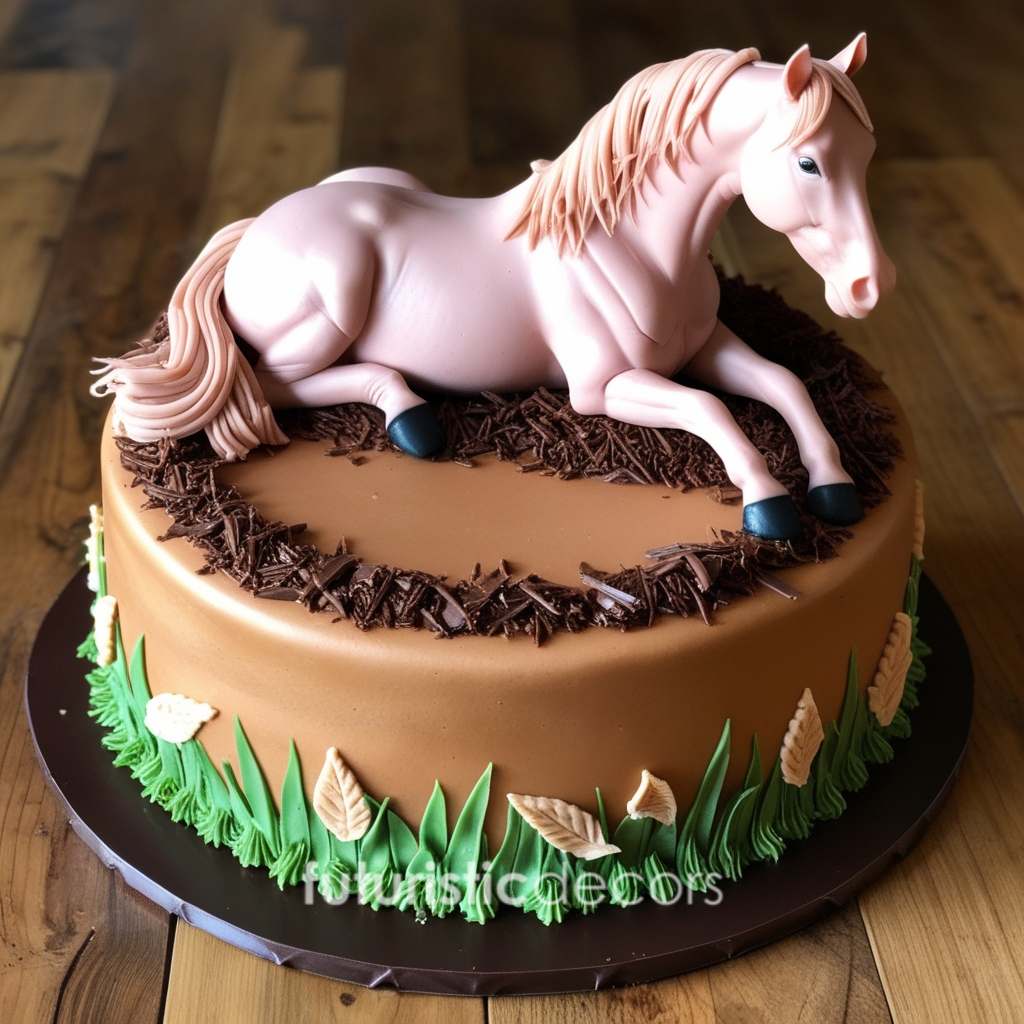
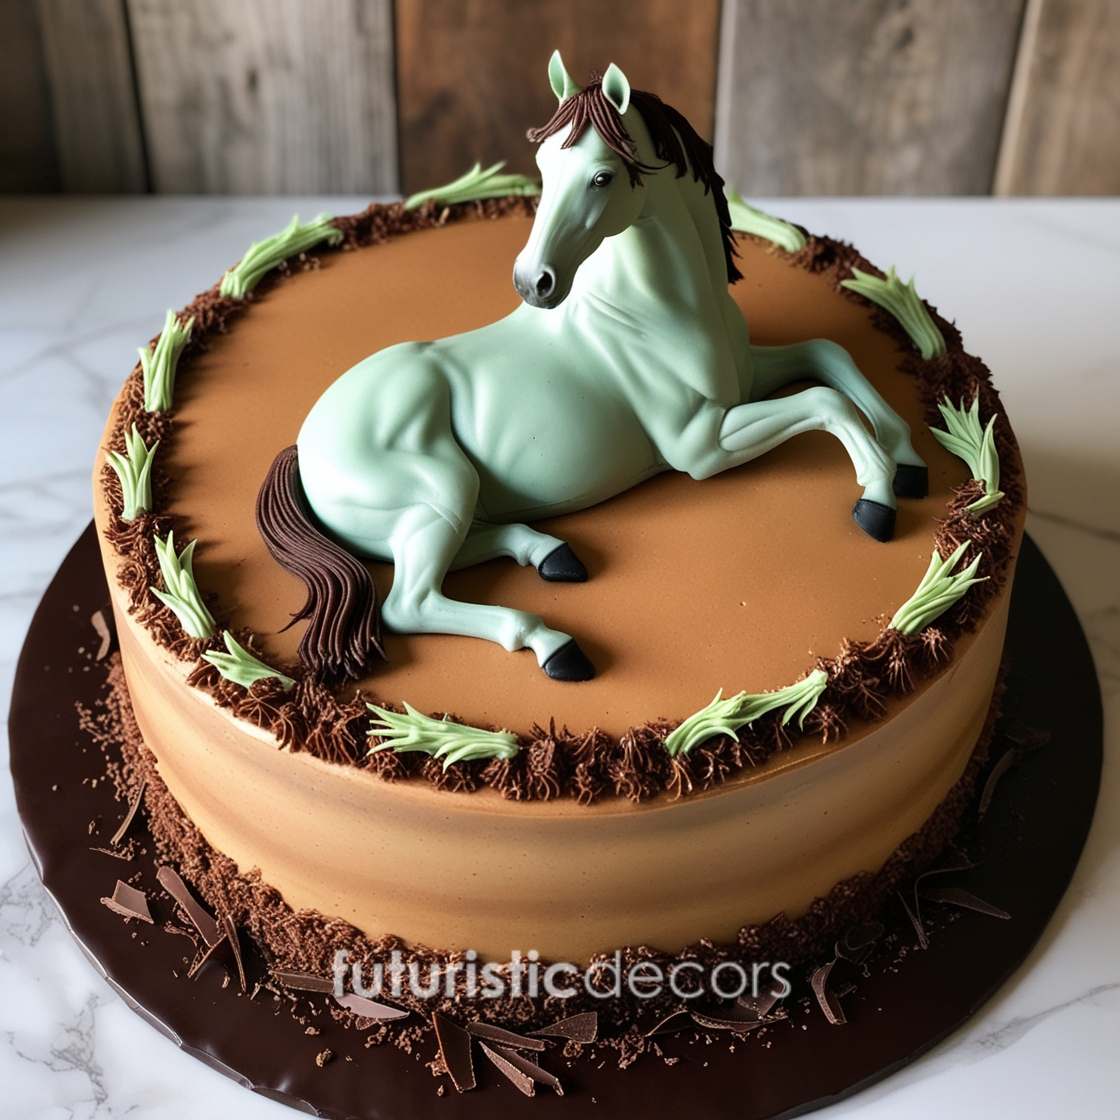
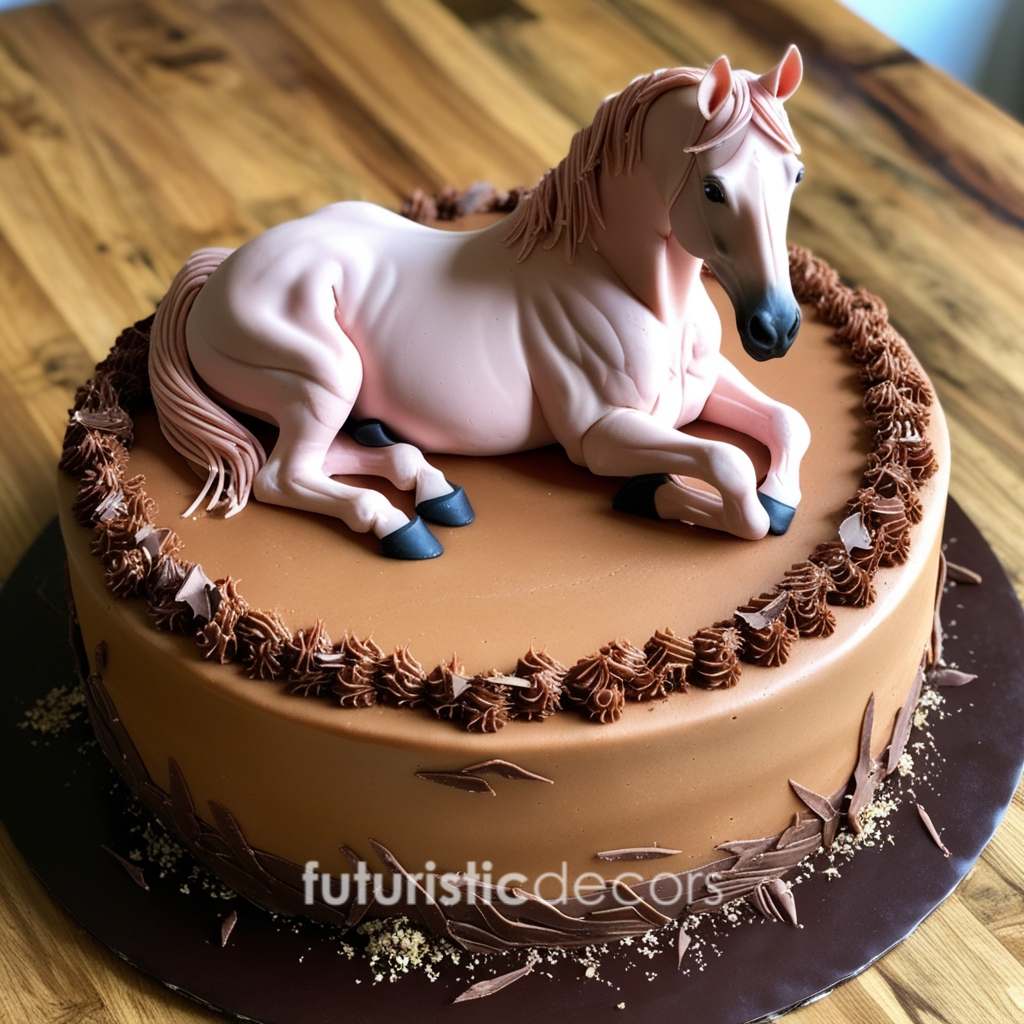
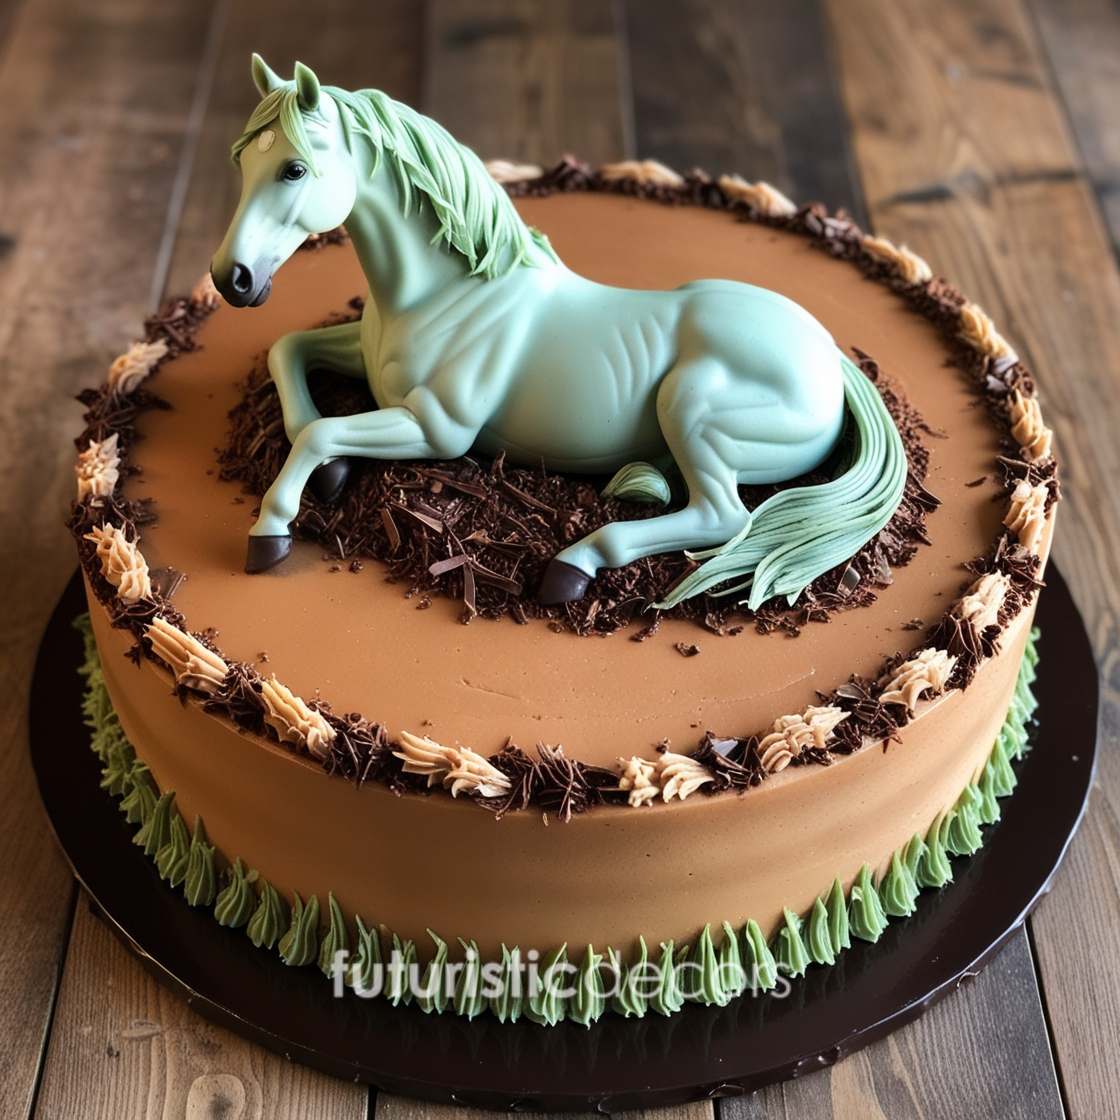
Bringing the Horse Theme to Life: Stunning Horse Birthday Cake
Step 1: Base Frosting as a Canvas
Begin by applying a thin “crumb coat” of buttercream to lock in any loose crumbs. Chill the cake for 15–20 minutes before applying a final, smooth layer of buttercream. This even layer provides a pristine canvas for your decorations.
Step 2: Crafting Horse Silhouettes and Figures
There are several creative methods to incorporate horse imagery into your cake:
Fondant Figures:
- Roll out your fondant to about 1/8-inch thickness. Using horse-shaped templates, cut out figures that can be placed on top of the cake or used as decorative accents along the sides. You can create full-body figures or focus on the elegant profile of a horse’s head.
Edible Images:
- For a more detailed approach, edible images printed with food-grade inks can be used to create intricate depictions of horses. Carefully adhere these images to the cake with a thin layer of piping gel.
Hand-Piped Designs:
- If you’re comfortable with piping, use contrasting colors of buttercream to draw horse motifs directly onto the cake. Experiment with different nozzles to create fine lines and delicate details that mimic the graceful contours of a horse.

Step 3: Adding Accent Details
Small, thoughtful details can elevate the overall appearance:
- Horseshoes and Tack: Craft miniature horseshoes or decorative tack using fondant or modeling chocolate. Position these around the cake as scattered accents.
- Edible Glitter: A light dusting of edible glitter over the fondant or buttercream can mimic the subtle shimmer of a horse’s coat.
- Borders and Patterns: Consider piping elegant borders along the edges of each tier. Simple scalloped or lace-like patterns can frame your horse designs beautifully.
Step 4: Final Assembly and Personal Touches
Combine all the elements thoughtfully:
- Central Focus: Begin by positioning your main horse figure or silhouette in the center of the cake.
- Surrounding Elements: Arrange additional fondant figures, piped accents, and decorative accents around the centerpiece, maintaining balance and symmetry.
- Detailing: Use edible markers or food-safe paint to add fine details like the glint in a horse’s eye, the texture of its mane, or subtle shadows that give depth.
By following these steps, your Stunning Horse Birthday Cake will become a unique piece of edible art, capturing the spirit of equine beauty and celebrating the occasion in style.
Advanced Decoration Techniques: Stunning Horse Birthday Cake
For bakers ready to push the boundaries of creativity, these advanced techniques can take your cake from beautiful to breathtaking.
Sculpting with Fondant
- 3D Horse Figures: Instead of flat silhouettes, try sculpting a three-dimensional horse figure from fondant. Start with a basic structure using a small cake or even a shaped piece of modeling chocolate as a base, then cover with fondant. Use food-safe sculpting tools to carve details like the mane, tail, and muscular contours.
- Layering and Shading: Use different shades of fondant to create a sense of depth. For example, blend darker hues in the shadows and lighter tones where the light would naturally hit the figure. This technique adds realism and dynamism to your design.
Airbrushing Techniques
- Smooth Gradients: An airbrush tool can create soft gradients on both the cake and fondant figures. This method is excellent for adding a delicate wash of color that enhances the overall composition without overwhelming it.
- Highlighting Details: Airbrushing can be used to accentuate details, such as the shimmer on a horse’s coat or subtle contours on the cake surface. This modern technique lends a professional look to your creation.
Stenciling for Texture and Pattern
- Reusable Stencils: Invest in or create stencils featuring horse motifs or decorative patterns. Lightly dust powdered sugar, cocoa, or edible paint over the stencil to imprint intricate designs onto the cake.
- Layering Effects: Use stencils in multiple passes to create layered, multi-dimensional effects that mimic the texture of a horse’s mane or the graceful lines of its form.
Incorporating Edible Decorations
- Custom Cake Toppers: Personalize your cake with custom toppers that include the birthday person’s name, age, or a special message. Use edible ink or hand-pipe letters on fondant shapes.
- Interactive Elements: Consider adding small, interactive edible elements such as miniature fondant horseshoes or charms that can be removed and enjoyed separately.
These advanced techniques might require a bit of practice, but they offer limitless possibilities for creating a truly Stunning Horse Birthday Cake that will be remembered for years to come.
Troubleshooting and Expert Tips: Stunning Horse Birthday Cake
Even the most experienced bakers encounter challenges. Here are some common issues and solutions to help ensure your cake turns out perfect every time.
Baking Challenges
- Cake Sinking in the Middle:
- Cause: This can occur if the oven temperature is too low or if the batter was overmixed.
- Solution: Use an oven thermometer to verify your oven’s accuracy, and mix your ingredients only until just combined.
- Uneven Layers:
- Cause: Domed cakes are common if baked without proper leveling.
- Solution: Use a cake leveler or serrated knife to trim the tops for flat, even layers before stacking.
- Dry Cake Texture:
- Cause: Overbaking or insufficient moisture in the batter can lead to dryness.
- Solution: Check the cake a few minutes before the expected finish time and consider adding sour cream for extra moisture.
Decoration Challenges
- Fondant Cracking or Tearing:
- Cause: Fondant that is too dry can crack, while overly warm fondant may tear.
- Solution: Knead fondant with a small amount of shortening to keep it pliable, and work in a cool, draft-free environment.
- Piping Inconsistencies:
- Cause: Inconsistent pressure or the wrong nozzle size can affect your piping work.
- Solution: Practice your piping technique on parchment paper before applying designs to the cake. Choose a nozzle that matches the scale of your design and maintain steady pressure.
General Expert Tips
- Prepare in Advance: Organize all ingredients and tools before starting. Pre-measure everything to avoid last-minute stress.
- Take Your Time: Each step—from baking to decorating—benefits from patience. Rushing can lead to mistakes, especially with intricate designs.
- Practice Makes Perfect: If you’re new to cake decorating, consider practicing on smaller projects. Mastering a few techniques on miniature cakes or fondant pieces can boost your confidence.
- Embrace Creativity: Don’t be afraid to experiment with different designs and textures. Your Stunning Horse Birthday Cake is a canvas for your creativity—make it uniquely yours!
By being mindful of these troubleshooting strategies and expert tips, you can overcome common hurdles and ensure that your final cake is both delicious and visually spectacular.
Serving, Storage, and Final Touches
Presentation Ideas
The presentation of your cake is as important as the baking process. Here are some ideas to ensure your cake steals the show:
- Display Stand: Use an elegant cake stand that complements the horse theme. A rustic wooden board or a sleek modern stand can both work, depending on your style.
- Table Decor: Enhance your presentation with themed table settings. Incorporate horse-themed napkins, centerpieces, or even miniature figurines that echo the cake’s design.
- Lighting and Photography: For birthday celebrations, consider the lighting. Natural light or soft, diffused lighting can highlight the intricate details of your cake. Snap photos from multiple angles to capture its full beauty.
Storage Guidelines
Proper storage is crucial to maintain the cake’s freshness and appearance:
- Short-Term Storage: If your cake will be served within a few hours, cover it with a cake dome or loosely with plastic wrap. This protects the decorations and prevents the cake from drying out.
- Refrigeration: For cakes that need to be stored overnight or longer, place the cake in the refrigerator. Allow it to come back to room temperature before serving to maximize flavor and texture.
- Transporting the Cake: If you need to transport your creation, secure it on a stable board and consider using a non-slip mat. A well-insulated cake box can also protect your masterpiece during transit.
Final Touches: Stunning Horse Birthday Cake
- Personalization: Add a personalized message with piped buttercream or edible lettering. Whether it’s the birthday person’s name, age, or a heartfelt message, these final touches make the cake uniquely special.
- Edible Accents: Scatter small, decorative items—like fondant horseshoes, sugar flowers, or even glitter accents—around the base of the cake to tie the theme together.
- Serving Suggestions: Pair your Stunning Horse Birthday Cake with complementary treats such as a light, fruity punch, sparkling cider, or even freshly brewed coffee. This enhances the overall celebration experience.
Conclusion: Stunning Horse Birthday Cake
Baking a Stunning Horse Birthday Cake at home is a delightful journey that marries culinary skills with creative expression. Every step—from gathering your ingredients to mastering advanced decoration techniques—plays a crucial role in producing a cake that is as mesmerizing as it is delicious.
The process outlined in this guide is designed to help you overcome common challenges, embrace your creativity, and produce a cake that stands out as the centerpiece of any horse-themed celebration. Whether you’re an experienced baker or trying your hand at a themed cake for the first time, the effort, patience, and attention to detail will shine through in every bite.
As you embark on this creative adventure, remember that the true beauty of baking lies in the memories you create along the way. The process of planning, baking, and decorating is an opportunity to express your passion for horses and share a piece of art with your loved ones. Your Stunning Horse Birthday Cake is not just a dessert—it’s a celebration of life, creativity, and the joy of making something truly spectacular from scratch.
So, preheat your oven, gather your tools, and let your imagination gallop free. With each step, you’re crafting more than a cake—you’re creating an experience that will be cherished long after the last crumb is gone.
Happy baking, and here’s to creating a cake that captures the spirit and elegance of horses in every delightful detail!


