
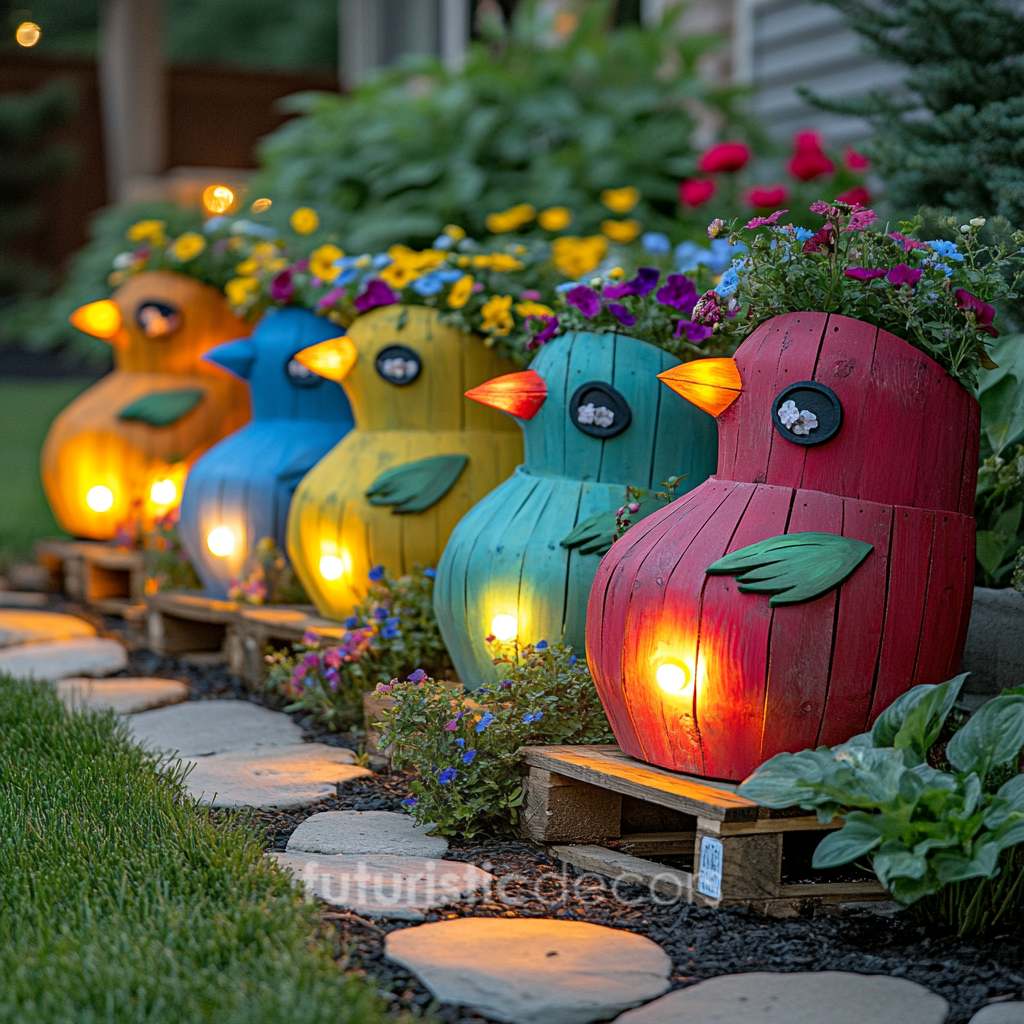
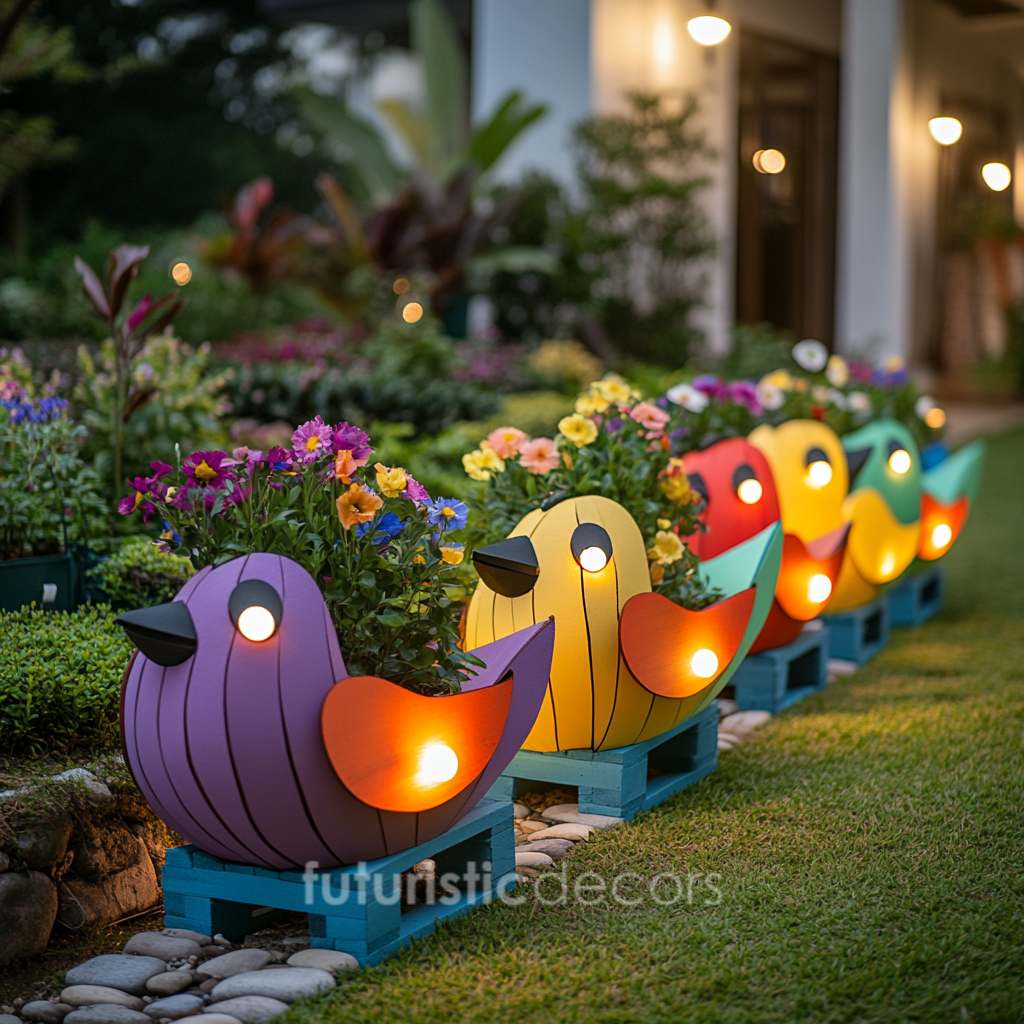
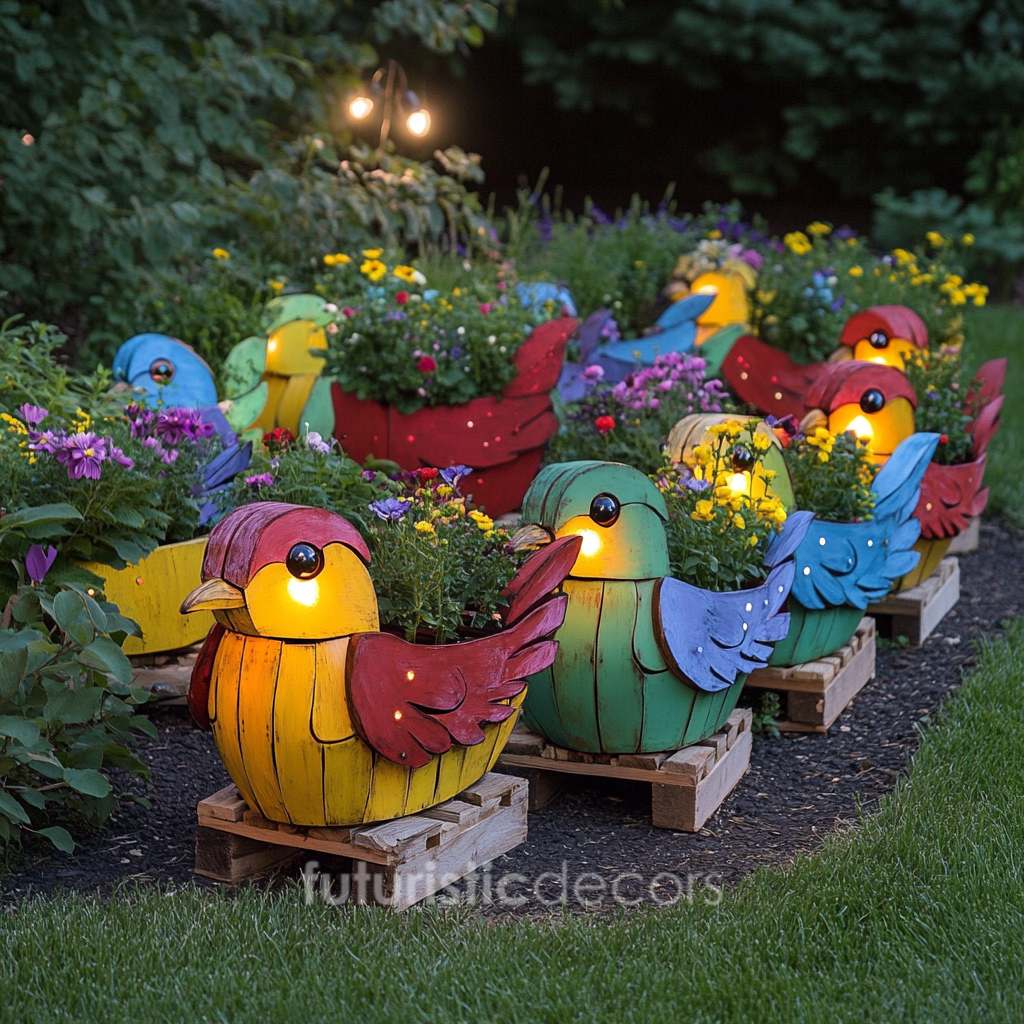
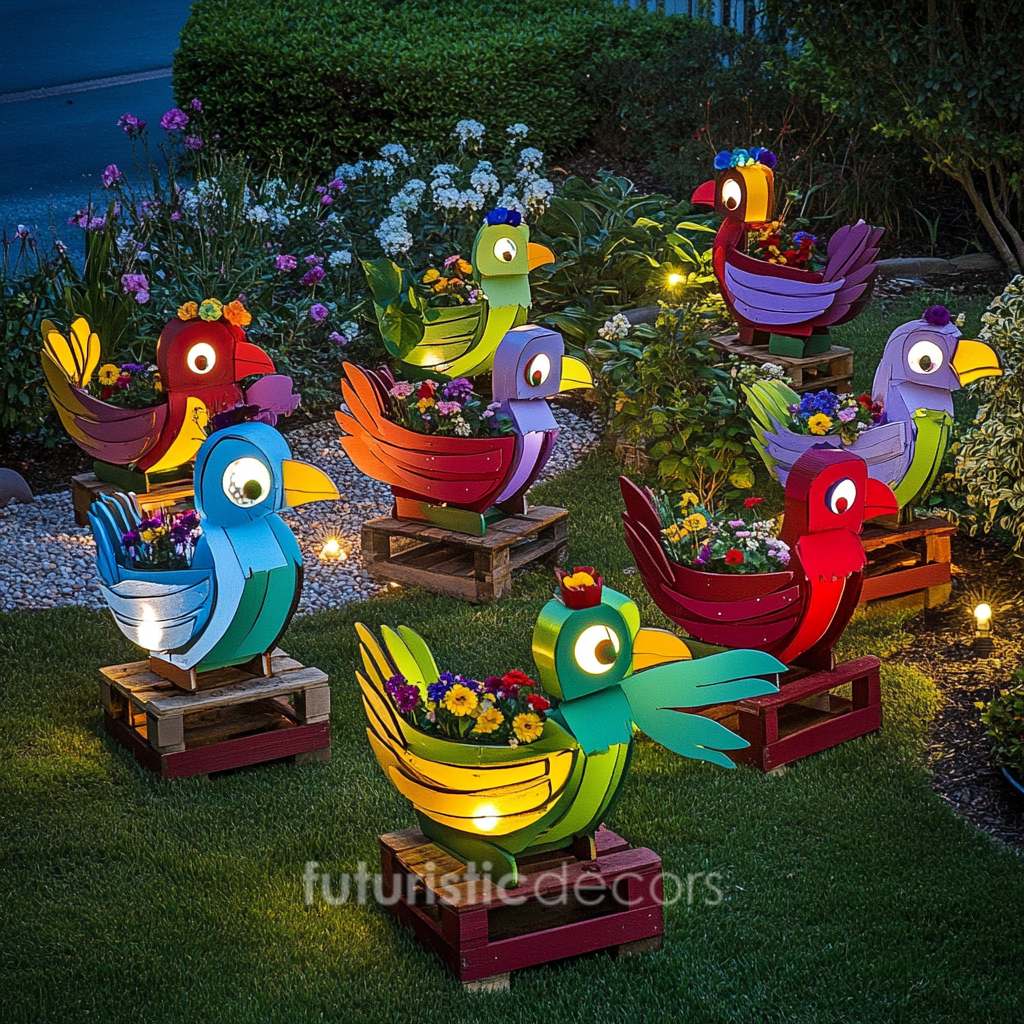
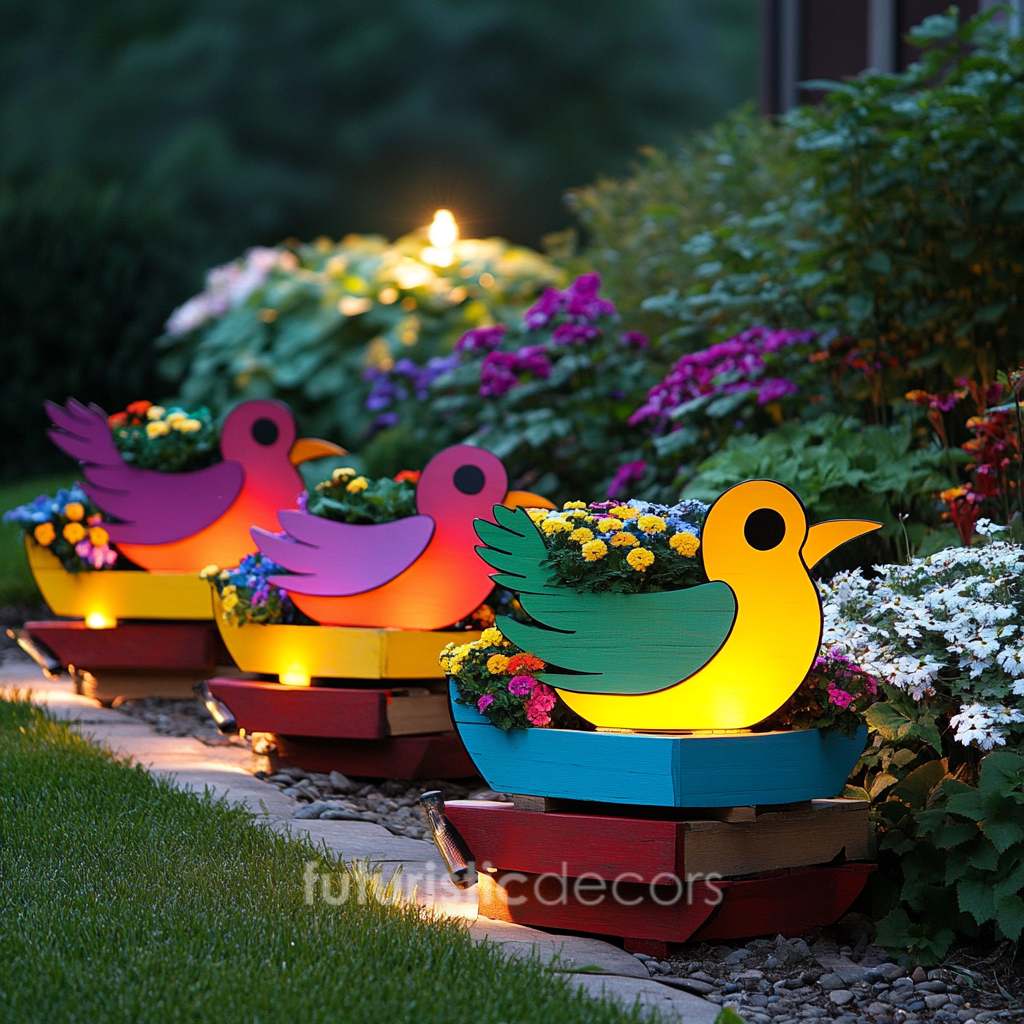
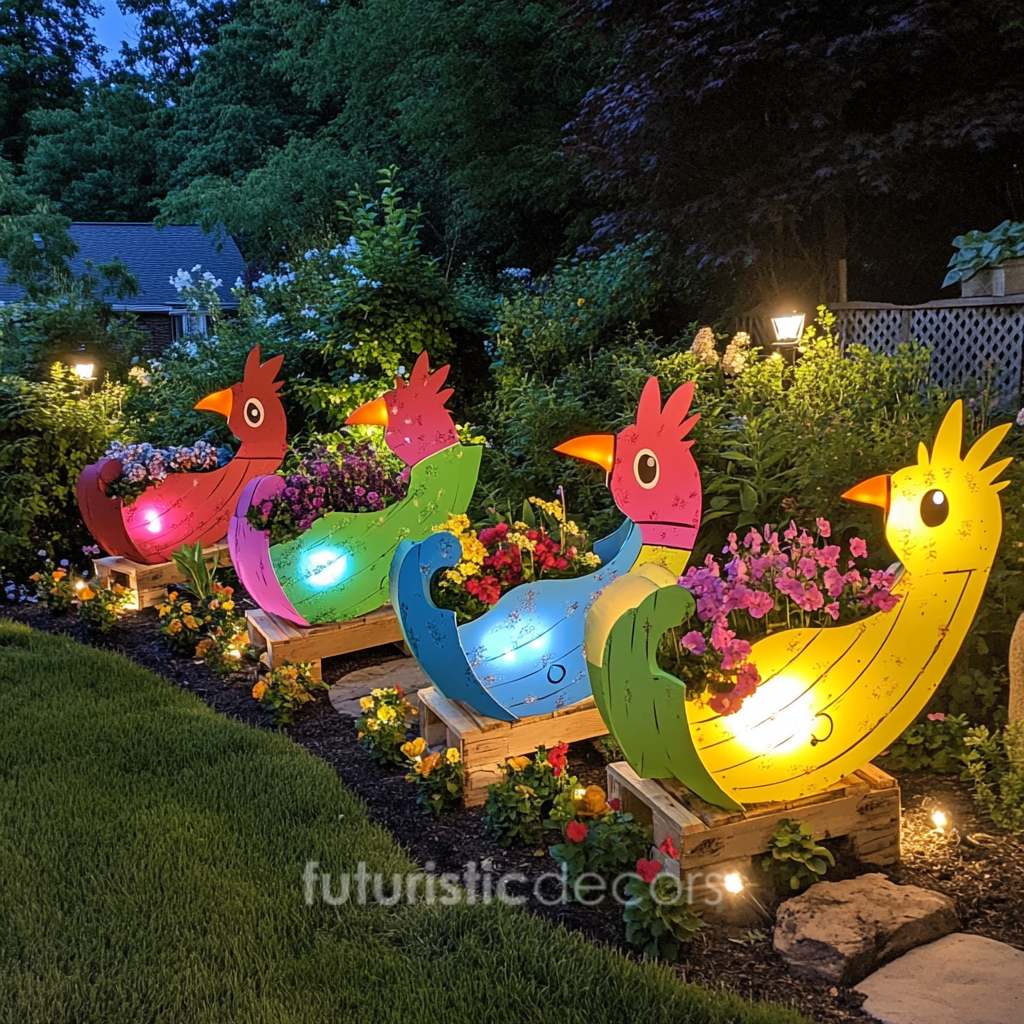
Upcycling wooden pallets into functional garden art is a rewarding way to blend sustainability, creativity, and outdoor design. Among the myriad upcycling possibilities, a Bird Pallet Planter stands out as a whimsical yet practical addition to any patio, balcony, or backyard oasis. This comprehensive guide will walk you through every stage—from selecting the perfect pallet to planting vibrant blooms—so you can transform inexpensive scrap wood into a stunning, bird‑friendly vertical garden. Whether you’re a seasoned DIY enthusiast or a beginner eager to try your hand at upcycling, you’ll find clear, detailed instructions that ensure your project is both beautiful and long‑lasting.
Why Choose a Bird Pallet Planter?
A Bird Pallet Planter offers several compelling benefits. First, it maximizes vertical space, making it perfect for small yards or urban balconies where ground space is limited. Second, the multi‑tiered layout attracts pollinators and feathered friends, turning your garden into a lively ecosystem. Third, repurposing an old pallet cuts down on waste and saves money compared to purchasing a pre‑made planter. Finally, customizing your pallet allows you to express personal style—whether you prefer rustic charm, modern minimalism, or a bohemian flair. By following this guide, you’ll create not just a planter, but a conversation‑worthy focal point that blends form and function.
Materials & Tools You’ll Need: Bird Pallet Planter
Before diving into the build, gather the following materials and tools:
- One wooden pallet (standard size, free of chemicals and rot)
- Sandpaper or power sander (80‑grit and 120‑grit)
- Circular saw or handsaw
- Drill and bits (3/16″ for pilot holes)
- Exterior‑grade screws (1½” to 2″ length)
- Landscape fabric or plastic liner
- Staple gun with staples
- Exterior paint or stain (optional)
- Clear waterproof sealant
- Mounting hardware (D‑rings, metal brackets, or legs)
- Potting soil and compost
- Plants and seeds (herbs, trailing flowers, succulents)
Having the right gear ensures a smooth process and a durable result. Consider investing in quality tools if you plan to take on more upcycling projects in the future.
Selecting and Preparing the Pallet
Not all pallets are created equal. Start by finding a sturdy, heat‑treated (HT) pallet free from chemical stamps, which are often marked with “MB” for methyl bromide. Inspect each board carefully, discarding any that are warped, cracked, or infested with insects.
- Clean the pallet: Use a stiff brush to remove dust, spider webs, and debris. A light rinse with water is acceptable, but allow the wood to dry completely to prevent mold growth.
- Sand the surface: Begin with 80‑grit sandpaper to smooth rough edges and remove splinters. Finish with 120‑grit for a clean surface ready for paint or sealant.
- Check for loose nails: Hammer any protruding nails back in or remove and replace with exterior‑grade screws. A solid structure is essential for supporting soil weight and moisture.
This prep work may take an hour or two but guarantees a safe, durable foundation for your Bird Pallet Planter.
Designing Your Bird Pallet Planter Layout
With a prepped pallet in hand, it’s time to plan your bird‑friendly design. Sketch two or three layout ideas on paper, considering these elements:
- Tier height: Decide how many planting rows you want—two to four tiers work best for standard pallets.
- Compartment sizes: Vary the depth of your planting pockets to accommodate different plant root systems, from shallow succulents to deeper herb roots.
- Bird features: Carve or attach small wooden perches, decorative bird silhouettes, or mini birdhouses to invite feathered visitors.
- Drainage: Plan gaps or holes at the bottom of each row for excess water to escape, protecting plants from root rot.
Once you finalize a layout, lightly mark cutting lines and attachment points on the pallet with a pencil. This blueprint will guide your cutting and assembly stages.
Cutting and Assembling Your Bird Pallet Planter
Now comes the hands‑on part. Work in a well‑ventilated area and wear safety goggles and gloves.
- Define planting tiers: Using your saw, cut horizontal slats on the pallet face to create distinct rows of planting pockets. Remove the top three boards in each section, leaving side supports intact.
- Build raised pockets: Measure and cut additional pallet boards to form the bottom of each pocket. Secure them to the front edge of each tier with exterior screws.
- Reinforce sidewalls: Attach narrow slats vertically between the pallet’s outer beams to form sidewalls. This prevents soil from spilling and maintains clean lines.
Take your time to ensure each pocket is level and tightly secured. A well‑assembled frame resists warping and supports greater soil weight, making your Bird Pallet Planter both sturdy and reliable.
Reinforcing and Waterproofing
Pallet wood is porous and can degrade when exposed to constant moisture. Follow these steps to reinforce and waterproof your planter:
- Landscape fabric lining: Cut strips of landscape fabric to line the inside and bottoms of each pocket. Staple the fabric securely, leaving enough slack for soil containment without impeding water drainage.
- Seal gaps: Fill any cracks or seams with exterior‑rated wood filler to prevent soil leakage.
- Clear sealant coat: Apply two coats of a clear, waterproof sealant to all wood surfaces. Allow 24 hours drying time between coats. This barrier repels moisture while preserving the wood’s natural grain.
These precautions dramatically extend the lifespan of your Bird Pallet Planter and keep it looking fresh season after season.
Painting and Finishing Touches: Bird Pallet Planter
Color transforms a simple pallet into an eye‑catching piece of garden decor. Here are a few painting tips:
- Choose exterior‑grade paint or stain: Acrylic latex paint offers vibrant hues, while semi‑transparent stains highlight wood texture.
- Apply thin, even coats: Use a brush or small roller, allowing each coat to dry fully before adding the next. Two coats are usually sufficient for lasting coverage.
- Distressing technique: For a rustic look, lightly sand corners and edges after painting to expose the wood beneath.
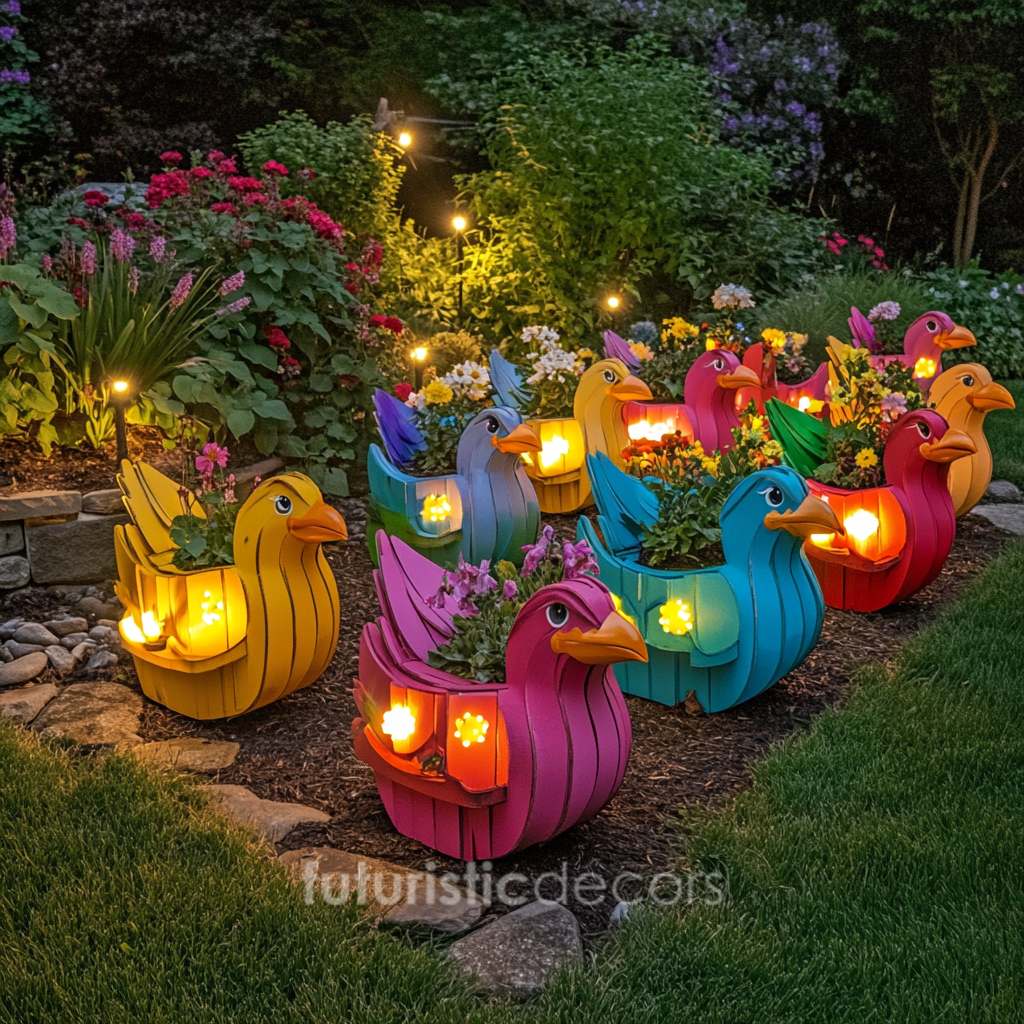
Once the paint cures, add your personal touches: adhesive bird decals, stenciled floral patterns, or metallic accents for a modern twist. Let your imagination guide you.
Installing Hanging or Standing Hardware
Decide whether you want a wall‑mounted or freestanding Bird Pallet Planter. Each option requires different hardware:
- Wall mounting: Install heavy‑duty D‑rings or metal brackets on the back of the pallet. Use masonry anchors or studs to secure the planter to brick, siding, or drywall.
- Freestanding display: Attach sturdy wooden legs to the bottom corners of the pallet, reinforcing with metal corner braces. Place the planter on a level surface and add anti‑slip pads under each leg.
Double‑check that all fasteners are tight and that the planter sits securely before adding soil and plants.
Selecting the Perfect Plants for Your Bird Pallet Planter
The right greenery will attract birds, enhance curb appeal, and thrive in your pallet’s unique environment. Consider the following plant categories:
- Pollinator‑friendly annuals: Petunias, marigolds, and zinnias offer bright splashes of color and nectar-rich blooms.
- Trailing vines: Ivy, sweet potato vine, or creeping jenny drape beautifully over the edges of each pocket.
- Succulents: Sedum, echeveria, and hens‑and‑chicks excel in shallow soil and add textural contrast.
- Herbs: Mint, oregano, and thyme release fragrant scents and provide practical kitchen use.
Mix and match plant types for multi‑season interest. Ensure that sun‑loving species occupy the top rows, while shade‑tolerant varieties settle lower.
Planting and Arranging Your Bird Pallet Planter
Follow these steps for a successful planting:
- Layer drainage: Place a thin layer of gravel or broken terra‑cotta pieces at the bottom of each pocket to improve drainage.
- Add soil mix: Fill pockets two‑thirds full with a lightweight potting mix enriched with compost.
- Position plants: Remove each plant from its nursery container, gently tease out roots, and set it in place. Aim for a balanced distribution of color and form throughout the planter.
- Top off: Fill remaining space around roots with potting mix, firming gently to eliminate air pockets.
- Water in: Thoroughly water each tier until moisture seeps through the drainage holes.
Within a week, your Bird Pallet Planter will begin to flourish, attracting feathered guests and delighting the eye.
Maintenance and Care Tips
Regular upkeep keeps your Bird Pallet Planter looking pristine and productive:
- Watering: Check moisture daily; pallet planters dry out faster than ground beds. Water deeply at least twice a week in hot weather.
- Fertilizing: Feed with a balanced liquid fertilizer every four to six weeks for sustained blooms.
- Pruning: Deadhead faded flowers and trim overgrown vines to maintain shape and health.
- Winterizing: Before the first frost, relocate a freestanding planter to a sheltered spot or cover it with frost cloth.
Refer to similar product models: Click here
Consistent care ensures enduring vitality and color throughout the growing season.
Creative Variations and Customizations
Once you master the basics, explore unique twists on your Bird Pallet Planter:
- Window box style: Attach a shallow shelf to the pallet face to mimic classic window boxes.
- Herb–spice combination: Label pockets with chalkboard paint and plant culinary herbs for easy kitchen access.
- Succulent mosaic: Create geometric patterns with contrasting succulent varieties.
- Mini birdhouse integration: Fasten small wooden birdhouses directly within the pallet framework for genuine avian activity.
These creative variations let you tailor the design to your aesthetic, climate, and gardening goals.
Common Mistakes and Troubleshooting
Even experienced DIYers encounter challenges. Here are solutions to frequent issues:
- Warping wood: Ensure full pallet drying before assembly, and reinforce with extra brackets.
- Soil washout: Double‑check landscape fabric installation and seal all seams before filling with soil.
- Plant wilting: Adjust watering routine, and consider installing a drip irrigation line for consistent moisture.
- Inadequate drainage: Drill additional pilot holes or widen existing gaps to prevent waterlogging.
Addressing these pitfalls early keeps your Bird Pallet Planter thriving and damage‑free.
Inspiration Gallery and Next Steps
Now that you’ve built your foundational Bird Pallet Planter, draw inspiration from garden blogs, social media, and local nurseries. Experiment with seasonal color schemes—vibrant annuals in summer, ornamental kale and pansies in fall. Share your project photos online with the hashtag #BirdPalletPlanterDIY to connect with fellow upcyclers and gather fresh ideas for future enhancements.
FAQs: Bird Pallet Planters
Q1: What type of pallet is best for my Bird Pallet Planter?
Choose a heat‑treated (HT) pallet free of chemical stamps (avoid those marked “MB”). Inspect for dry, sturdy boards without rot or insect damage to ensure safety and longevity.
Q2: How often should I water the planter?
Because pallet planters dry out more quickly than in‑ground beds, water deeply two to three times per week in hot weather. Check soil moisture daily—if the top inch feels dry, it’s time to water.
Q3: Can I relocate or move the planter once it’s filled?
Freestanding planters can be moved when empty. Once filled with soil and plants, lifting becomes difficult. If you need mobility, consider installing heavy‑duty swivel casters on the legs under the pallet.
Q4: How do I prevent soil from leaking between slats?
Make sure to line each pocket with landscape fabric, stapling it securely behind every board. Seal any visible cracks or gaps with exterior wood filler before filling with soil.
Q5: Which birds are likely to visit my planter?
Your colorful blooms and trailing vines will attract hummingbirds, finches, and sparrows. Adding small perches or mini birdhouses further encourages nesting and feeding.
Q6: How can I protect my planter during winter?
For freestanding units, move the planter to an unheated garage or sheltered area. Alternatively, cover with a breathable frost cloth to shield plants and wood from extreme cold.
Conclusion: Bird Pallet Planter
Building a Bird Pallet Planter is an engaging, eco‑friendly project that marries upcycling with vibrant garden design. From selecting and prepping your pallet to planting and maintenance, each step offers creative satisfaction and practical rewards. As you watch colorful blooms cascade and birds visit your vertical sanctuary, you’ll appreciate how a simple pallet can transform into an enchanting focal point. Ready to elevate your outdoor space? Gather your materials, unleash your imagination, and start crafting your very own Bird Pallet Planter today!


